
Hosting Sencha app on Raspberry Pi
I'm super excited as this is my first Raspberry Pi project. If a tiny computer allows you to do a plethora of things effortlessly isn't it great? Particularly for Linux users playing around with Raspberry Pi should be a child's game.
What I'm trying to attempt here is pretty straight-forward. I will be hosting a Sencha app on Raspberry Pi by making it the web-server.
Pre-requisites:
1. Raspberry Pi with Raspbian OS running on it.
2. An ethernet connection.
First thing's first, if you have a Demo App already then all you have to do is move your app folder to var/www folder of Raspberry Pi. So, make sure your Sencha Demo App is running successfully on your web-browser. If you are new to Sencha you could refer this link to build and run a Sencha app or you could also use the examples.
You need to enable ssh to get started. You could ssh to RaspberryPi from your computer remotely and start installation if you are sharing the same network.
You can refer this link to enable ssh.
To check and begin installation from your computer, run:
Enter the password and you should see the control transfered to RPi like this.

Once your ssh is configured now you will need to make your RaspberryPi a webserver.
To make RaspberryPi your PHP webserver follow the steps below:
1. You will need to install Apache and PHP.
2. Once both are installed we will need to install MySql to make it a LAMP server.
It may ask for a MySql master database password. Provide and retype once asked again. If you want to make sure if MySql is installed, just run
You should be able to see the database Name, version and command.
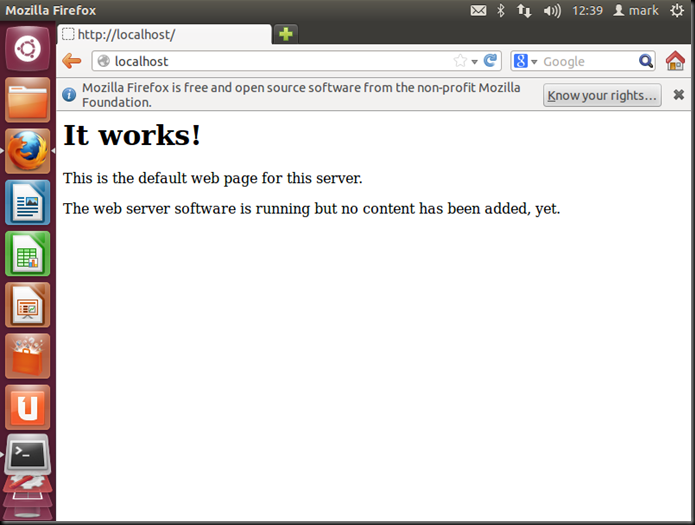
3. You can test Apache by going into the browser and enter RaspberryPi's IP. It should give you a screen saying- "IT WORKS". (Comes with Apache installation:))
4. To check PHP installation create a file info.php
Once your editor is open add:
5. Now try opening your_raspberry_pi_ip/info.php in your web-browser, it should show you the below screen.

6. Once you have got everything running, simply copy and place your app from www folder of cordova to/var/www of your Rpi. Here I'm simply tar-ing the www folder and from my computer's terminal copying it to RPi using ssh.
Copy the www.tar.gz from the path /home/pi and untar it in the /var folder
Voila! Now, your Sencha app is hosted successfully on your RaspberryPi. To test if your app is hosted type the RaspberryPi IP in a web-browser from your Android, iOS or desktop it should open your Sencha app.
P.S: Use Chrome, Chromium, Firefox or Safari for testing. Web-browsers like Midora, etc on RPi are not supported.
What I'm trying to attempt here is pretty straight-forward. I will be hosting a Sencha app on Raspberry Pi by making it the web-server.
Pre-requisites:
1. Raspberry Pi with Raspbian OS running on it.
2. An ethernet connection.
First thing's first, if you have a Demo App already then all you have to do is move your app folder to var/www folder of Raspberry Pi. So, make sure your Sencha Demo App is running successfully on your web-browser. If you are new to Sencha you could refer this link to build and run a Sencha app or you could also use the examples.
You need to enable ssh to get started. You could ssh to RaspberryPi from your computer remotely and start installation if you are sharing the same network.
You can refer this link to enable ssh.
To check and begin installation from your computer, run:
$ ssh pi@your_raspberry_pi_ip
Enter the password and you should see the control transfered to RPi like this.
Once your ssh is configured now you will need to make your RaspberryPi a webserver.
To make RaspberryPi your PHP webserver follow the steps below:
1. You will need to install Apache and PHP.
$ sudo apt-get update
$ sudo apt-get install apache2 php5 libapache2-mod-php5
2. Once both are installed we will need to install MySql to make it a LAMP server.
$ sudo apt-get install mysql-server mysql-client php5-mysql
It may ask for a MySql master database password. Provide and retype once asked again. If you want to make sure if MySql is installed, just run
$ mysql -u root -p
You should be able to see the database Name, version and command.
3. You can test Apache by going into the browser and enter RaspberryPi's IP. It should give you a screen saying- "IT WORKS". (Comes with Apache installation:))

4. To check PHP installation create a file info.php
$ touch info.php
$ vi info.php
Once your editor is open add:
<?php
phpinfo();
?>
:wq!
5. Now try opening your_raspberry_pi_ip/info.php in your web-browser, it should show you the below screen.
6. Once you have got everything running, simply copy and place your app from www folder of cordova to/var/www of your Rpi. Here I'm simply tar-ing the www folder and from my computer's terminal copying it to RPi using ssh.
$tar -zcvf archive.tar.gz www/
$scp www.tar.gz pi@your_raspberry_pi_ip:~/.
Copy the www.tar.gz from the path /home/pi and untar it in the /var folder
/var$tar -xvzf wwww.tar.gz
Voila! Now, your Sencha app is hosted successfully on your RaspberryPi. To test if your app is hosted type the RaspberryPi IP in a web-browser from your Android, iOS or desktop it should open your Sencha app.
P.S: Use Chrome, Chromium, Firefox or Safari for testing. Web-browsers like Midora, etc on RPi are not supported.
